![Fabicaon.png]](https://44059364.hs-sites.com/hs-fs/hubfs/Fabicaon.png?width=40&height=40&name=Fabicaon.png)
This article explains how to add products to your store by searching for style numbers, assigning decoration processes, selecting colors and sizes, and configuring additional settings.
1) Select Products from the left-hand menu.
2) Select  in the upper right to open the Add Products page.
3) Type in all the style numbers, separated by a comma, of the products you plan to decorate with the same design. As you add products to your store, you are creating your work order. After all the style numbers are entered select 
4) Make sure to narrow your search to only see the products you were looking for by selecting 
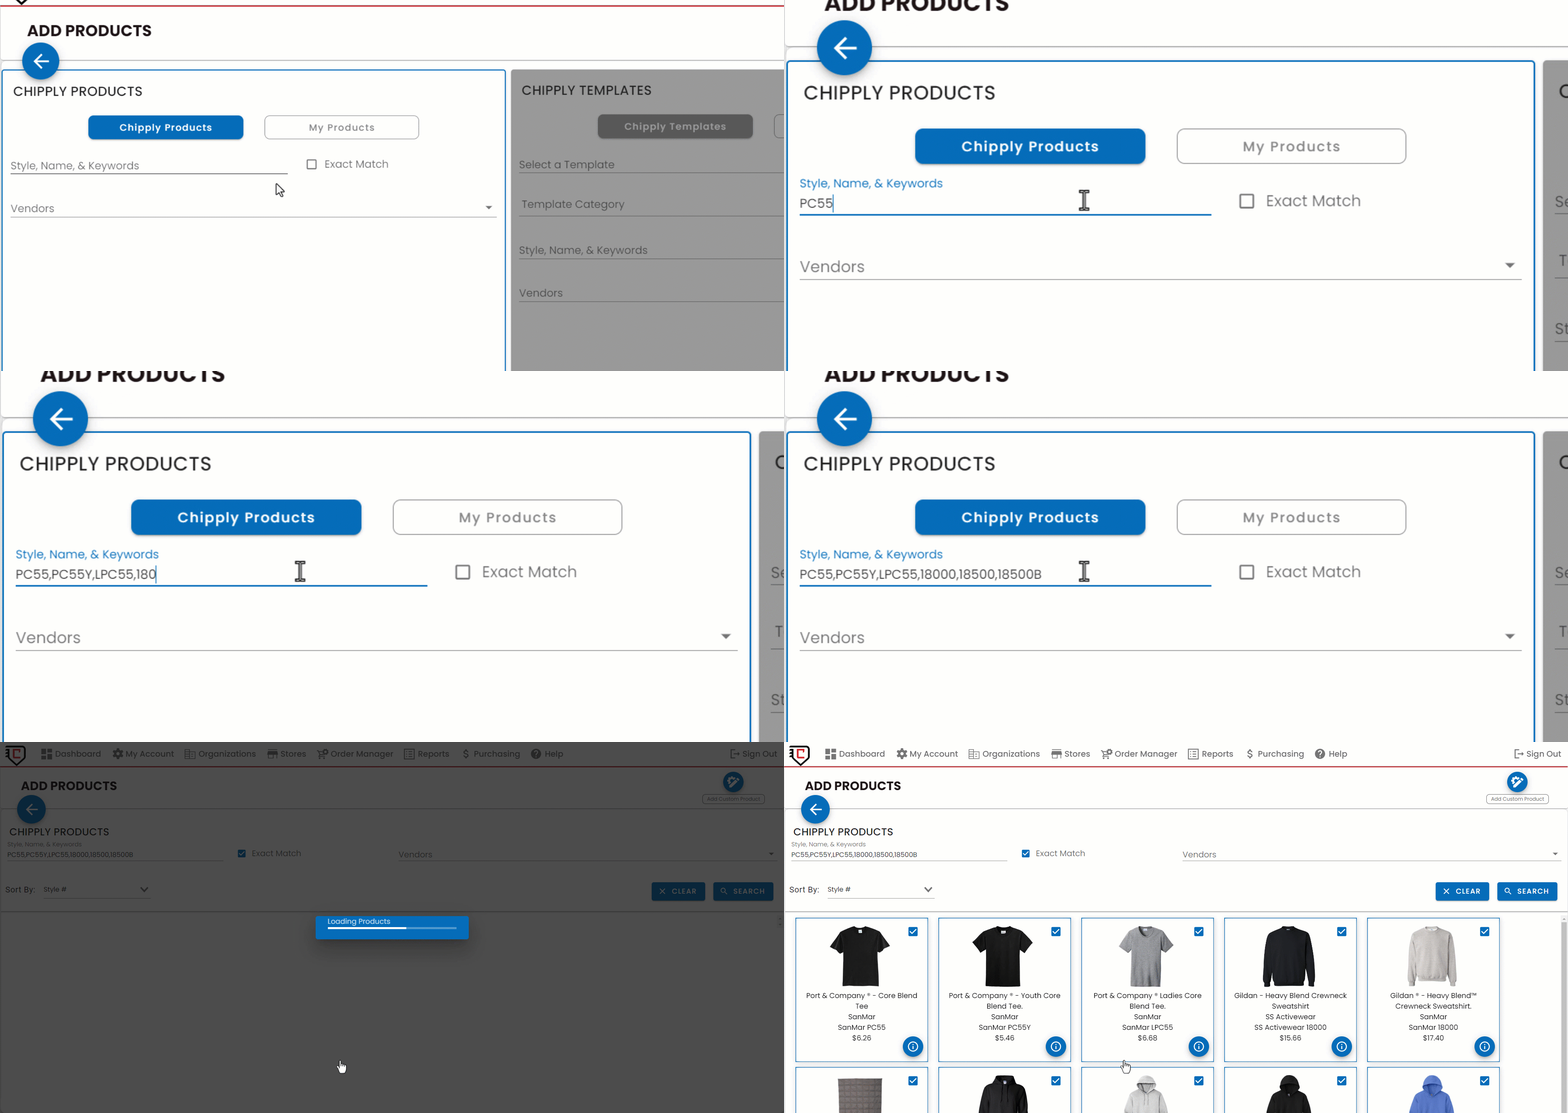
Grouping products by similar decoration style streamlines store building and work order clarity.
5) If "Exact Match" is selected, the products will appear in the order typed and be pre-selected for adding to your store. If all the items returned from the search are accurate, then select 
Review the items you wish to add to your store by deselecting any style numbers or vendors that you do not want to include.
There are several style numbers in our database that are shared by multiple vendors. Be sure to add the items to your store from your preferred vendor.
6) Confirm the number of items you are adding to the store by selecting 
7) Complete the following prompts to add your items to the store
7a) If you want to assign items to a category right away, select the category you wish to sort them into. Otherwise, leave the category blank and assign it later.
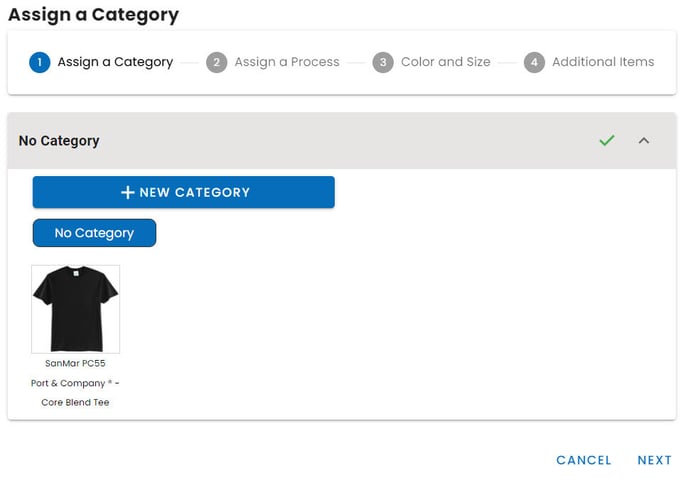
7b) Either create a new process, assign the products to an already established process, or assign it to an already existing process from another store.
How to Add to an Existing Process
If you already created processes, they will be available above the product images for you to select.
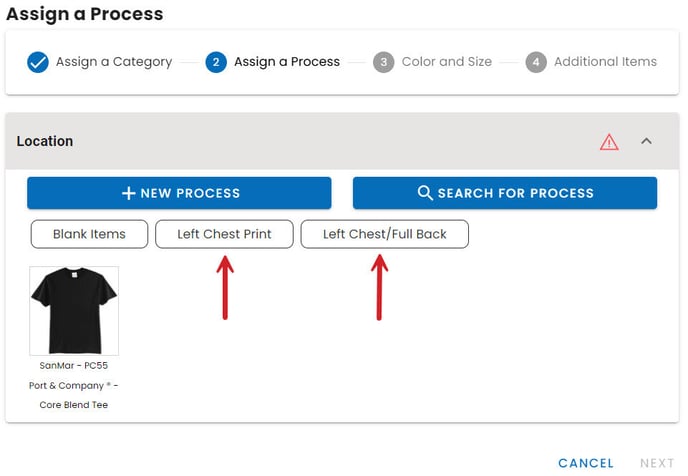
You can only add products to one process at a time. After you've added the products to the store, then you can add more processes to the products from there.
How to Add to a New Process
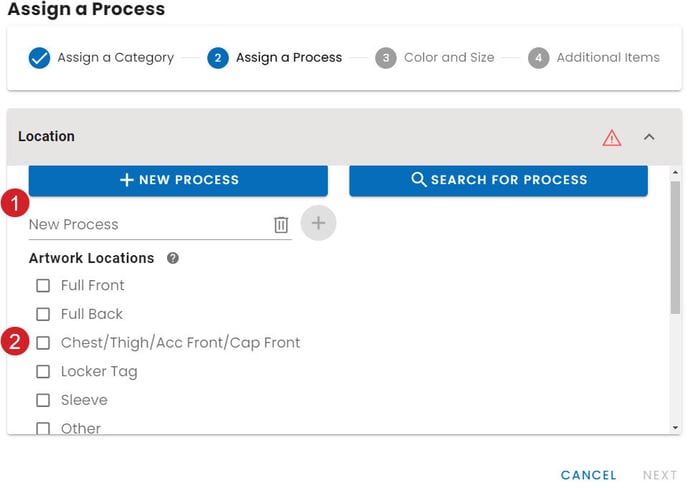
Select  then give your process a name and select where you want the artwork to fall on the products
You can select more than one location. (Ex. Chest/Thigh/Acc Front/Cap Front & Full Back)
 How to Import a Previously Used Process
You can use a process anyone within your company has created in the past. This is great if you have a complicated Varsity Jacket or uniform process you've used previously and don't want to recreate.
Select  and then use the search filters to locate the process you wish to use.
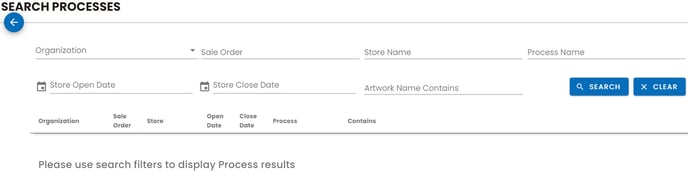
Once you've found your process you can select 
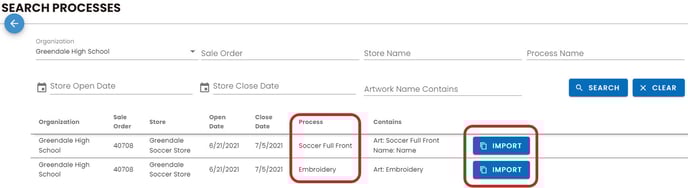
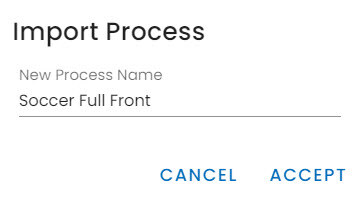
Then you can either retitle your process or keep it the same. Just select  when you're ready to add the process to your store.
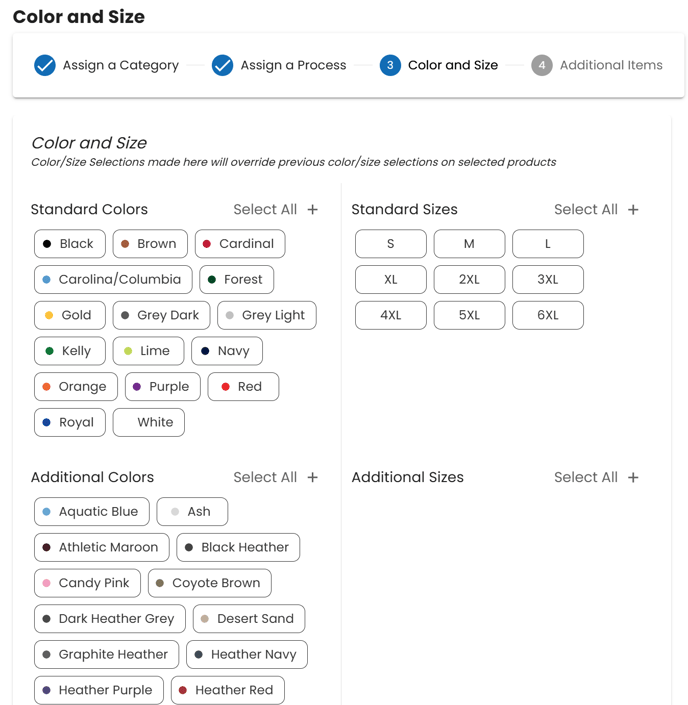
Color and Sizes
You can now choose the color and sizes that are associated with the product(s).
Note: Standard Colors & Sizes include the primary options for the products you've selected. Any additional colors and sizes associated with these products will appear under Additional Colors.
Once you are done, click NEXT.
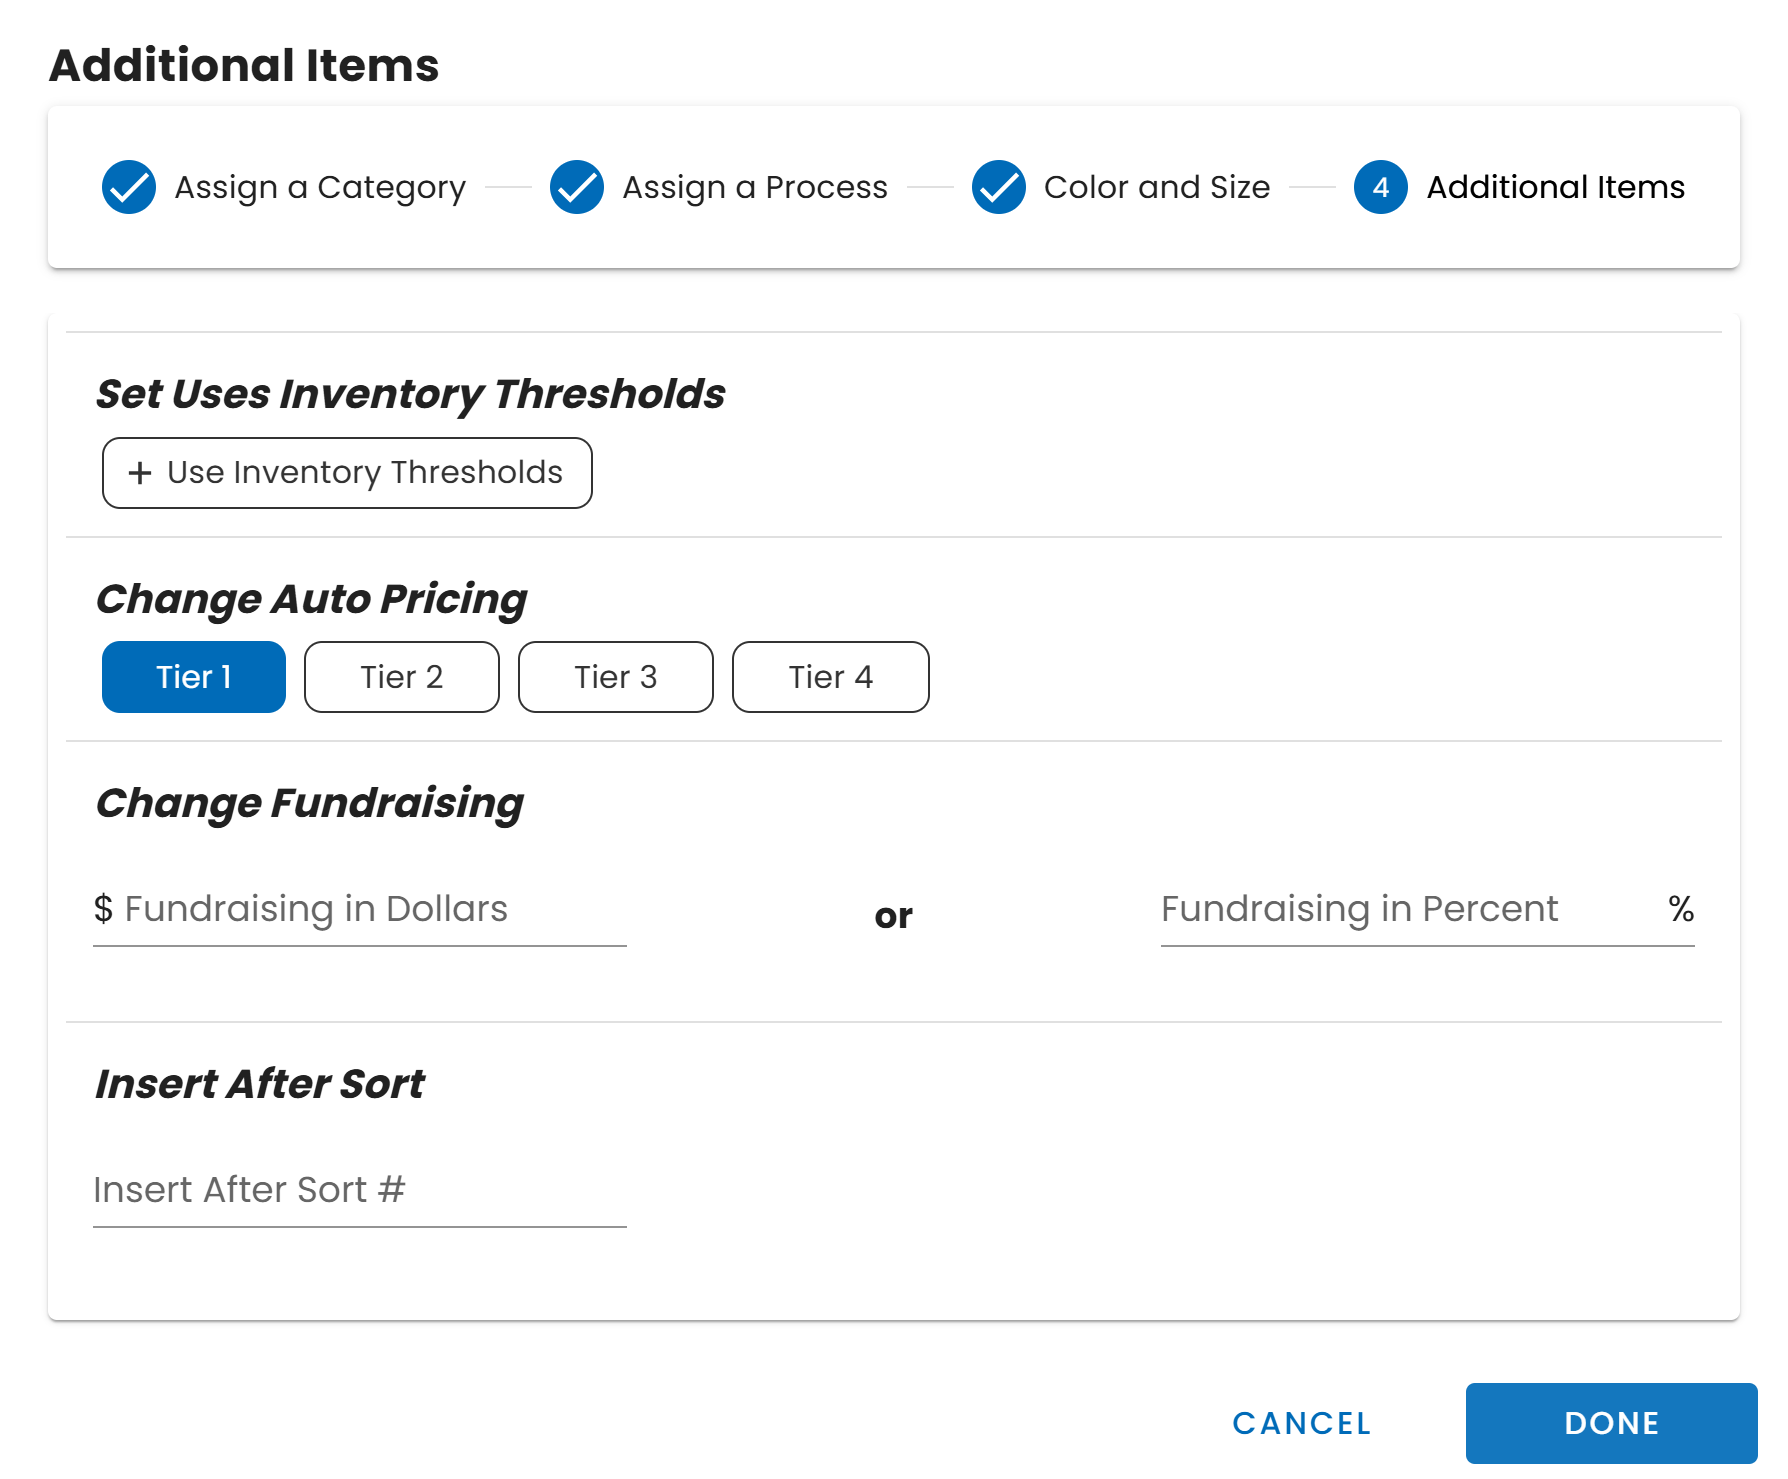
Additional Items
Finally, configure any of the following optional settings before completing the setup:
- Inventory Thresholds – Enable to set stock limits for these products.
- Auto Pricing Tier – Adjust the automatic pricing level applied to these products.
- Fundraising – Add fundraising functionality to these products.
- Product Order – Insert these products after a specific product in your store.
When you are finished, click DONE.
You can always adjust these settings after the products have been added to your store.
Now your products will be added to your store!