![Fabicaon.png]](https://44059364.hs-sites.com/hs-fs/hubfs/Fabicaon.png?width=40&height=40&name=Fabicaon.png)
We've made it easy to email customers quickly and efficiently by adding templates. With our Messaging feature, you can create templates of messages that you send time and time again, so you're not always retyping the body of the email. Simply select your desired Message Template, select your recipients, and click send!
How to Set Up a Message Template
- Click the Settings gear in the top right and select Dealer Settings.
- Go to the Message Templates tab.
- Click the + button in the top right. This opens the Create New Template drawer.
- Choose a Type:
- Default Automated – Store — sends automatically based on a trigger, like a set number of days before or after a store opens or closes.
- Message Ecom Customers — a saved template you pull in manually when messaging shoppers who've ordered.
-
- E-Certificates — for messages related to e-certificates.
- Purchasing — for purchasing-related notifications, like a pull-from-stock or purchase order notice.
- Choose which store types the template applies to: Group, Catalog, or Both.
- Enter a Template Name.
- If it's a Default Automated – Store template, set its Trigger: a relative trigger (for example, 3 days before the close date) or a static date and time.
- Choose Email, SMS, or Both, then fill in your recipients, subject, and message body. Merge fields are available to personalize the message automatically.
- Click Accept — or turn on Add More first to keep the drawer open and create another template right after.
How to Use Your Message Template
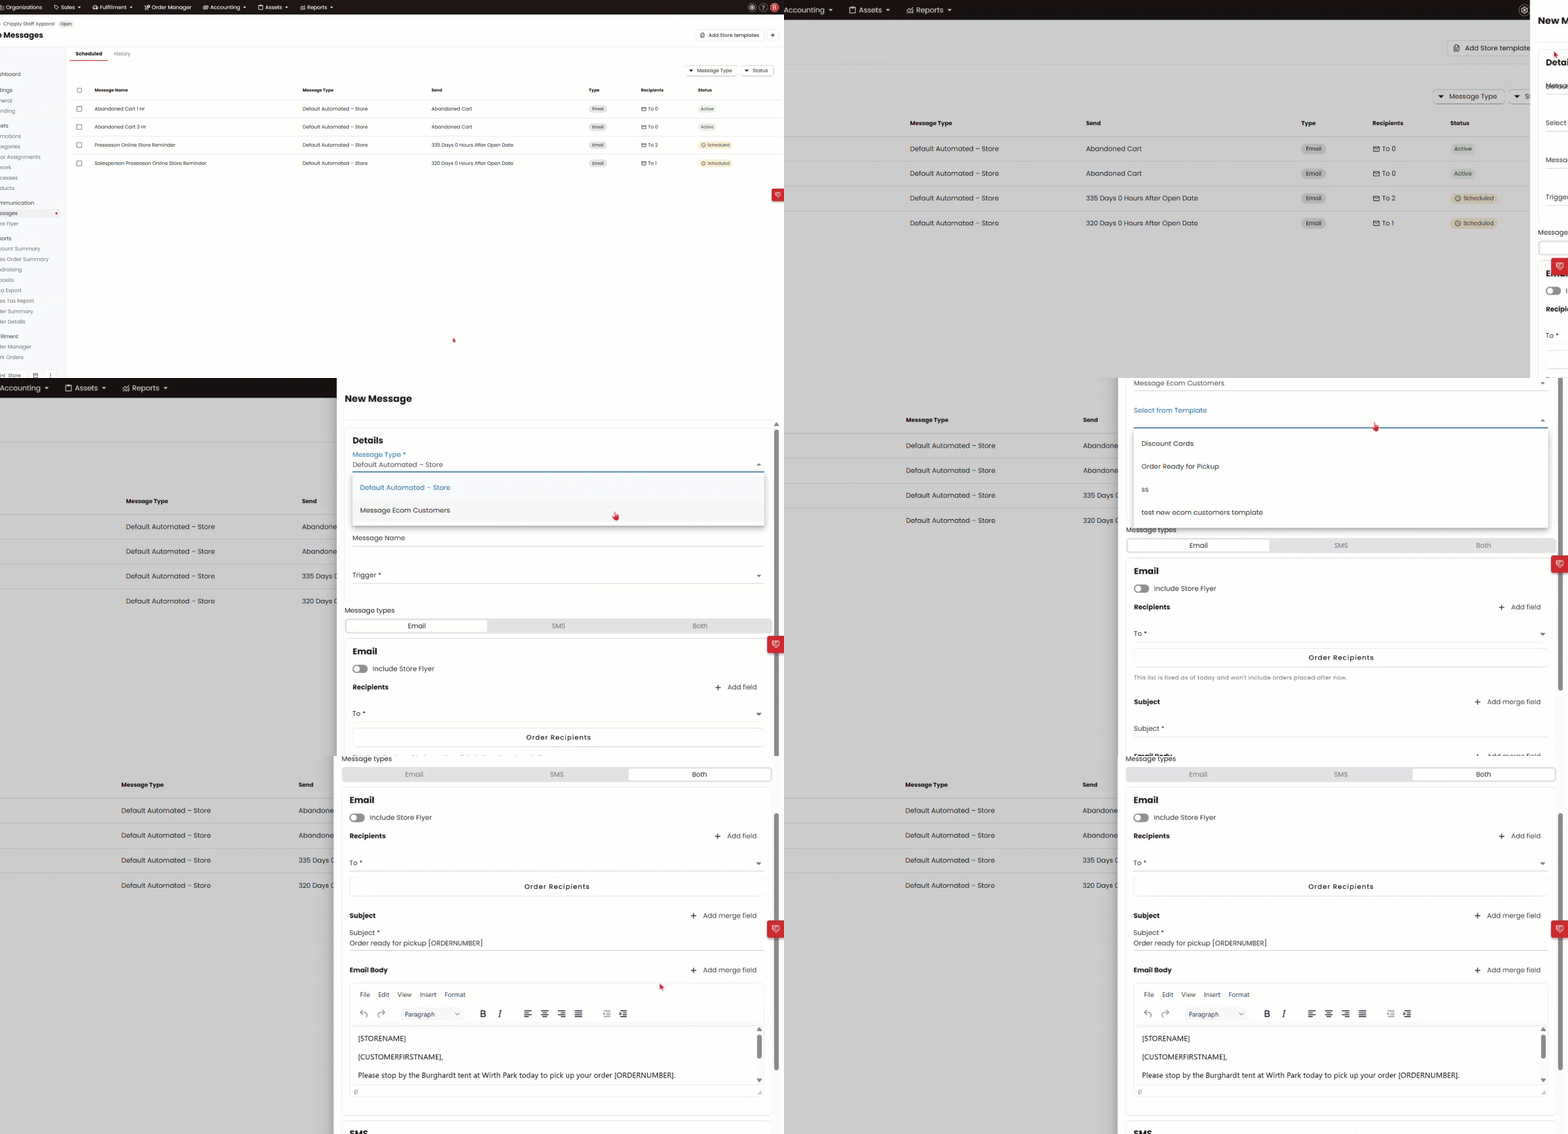
- From inside your store, click Messages in the left-hand menu.
- Choose a Message Type to see the templates you've set up for it.
- Open the Select From Template drop-down and pick the template you want to use. It will fill in automatically.