![Fabicaon.png]](https://44059364.hs-sites.com/hs-fs/hubfs/Fabicaon.png?width=40&height=40&name=Fabicaon.png)
A landing page is the front door of your store. Instead of shoppers landing straight on the full product listing, they see a branded welcome screen first, complete with your banner, a welcome message, and featured categories. It's a great way to set the tone before shopping begins, especially for year-round stores, corporate employee stores, or any store where you want a more polished, personal first impression.

This article covers how to turn landing pages on, how to set up categories so they display on your landing page, and how to create the custom graphics that make it all look great.
How to Turn On Landing Pages
Landing pages are toggled off by default on all stores. To turn one on:
- In your store, go to Branding.
- Click the Pages tab at the top.
- Under the Landing section, toggle it on.
- Click Modules, and toggle on Featured.
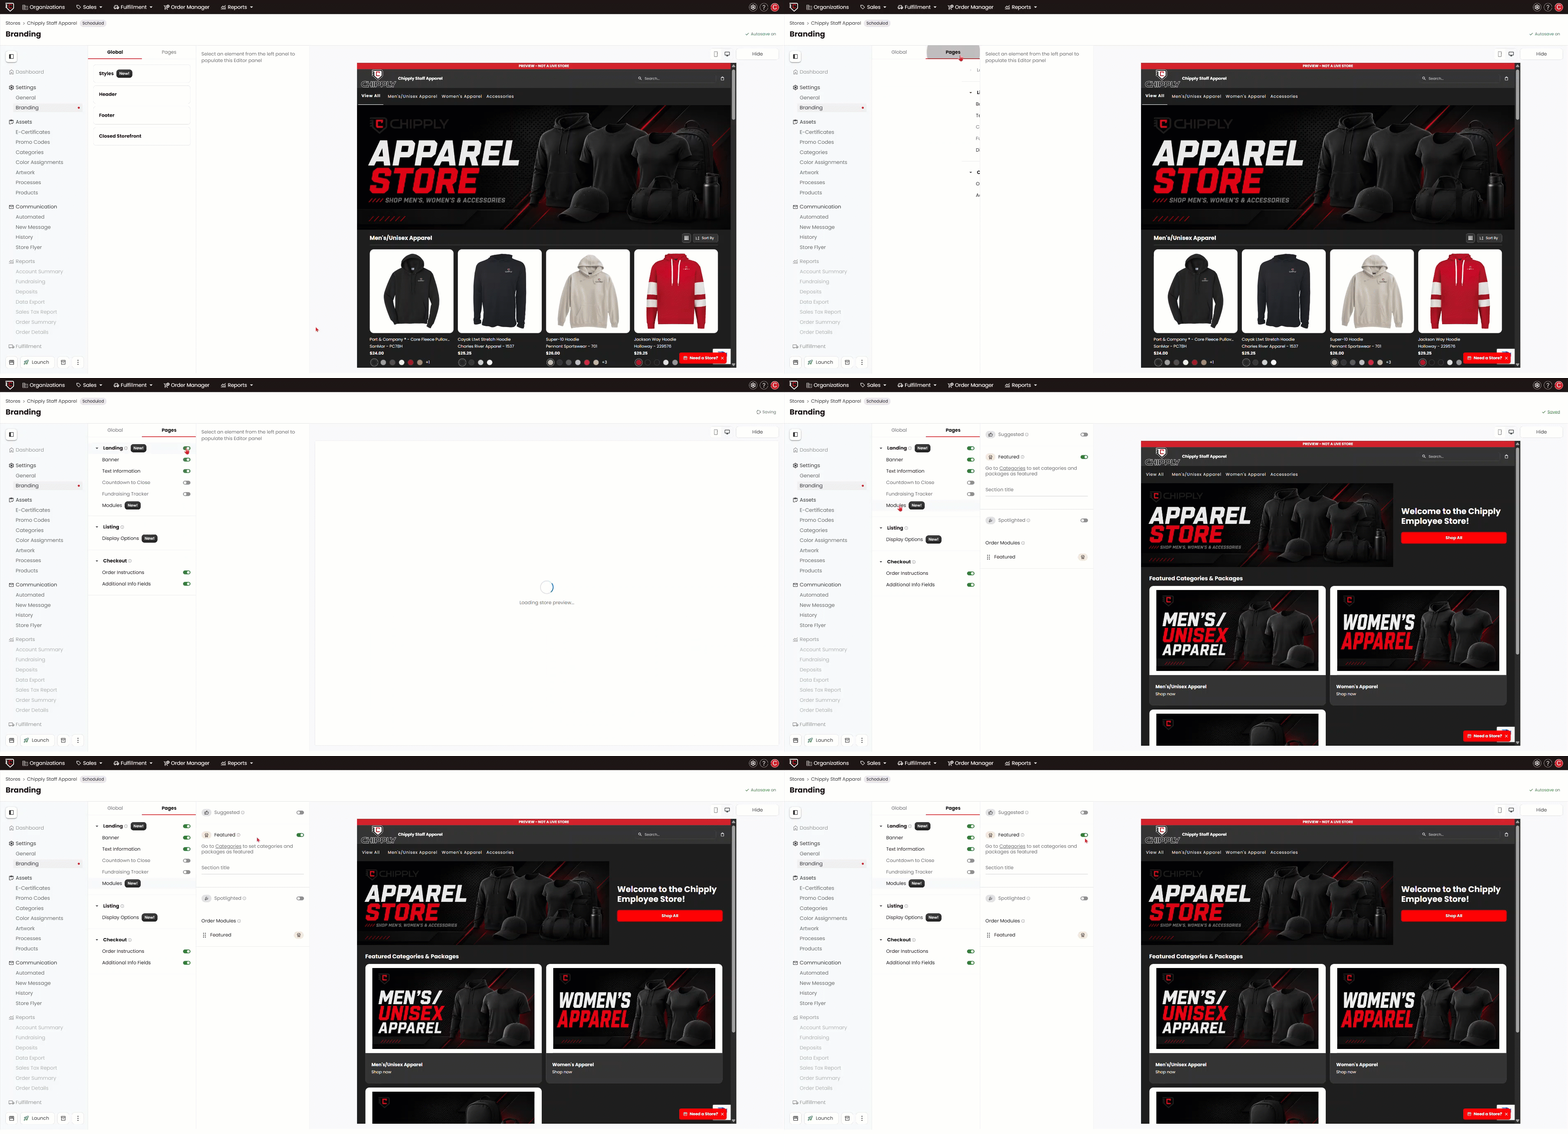
Your landing page can display up to three modules, which you can reorder by dragging them in the Order Modules section:
- Suggested — individual products you've marked as suggested
- Featured — categories or packages you've marked as featured (this is what creates the category tiles shown below)
- Spotlighted — products set as spotlighted, which can also appear on your listing page
Add and Feature Categories
To get the category tiles you see on polished landing pages (like Spirit Wear, Band, Cheer, and Cross Country in the example below), you'll need categories set up in your store, and you'll need to mark them as featured.
Add a category:
For more details, view our How to add a Category or Package Help article
- In your store, go to Categories in the left-hand menu.
- Click the + button in the top right and select Category or Package, depending on what you need for your store.
- In the Quick Add Categories section, type a category name and press enter to add another. When you're done, click Add Category, then Accept.
Feature a category on your landing page:
- within your categories page, click the edit pencil next to the category you want to feature.
- Under Landing Page Module, select Featured.
- Under Display Image, choose Select from Products to use an existing product photo, or Upload Image to add your own graphic.
- Select the image from your computer or a product image from your store.
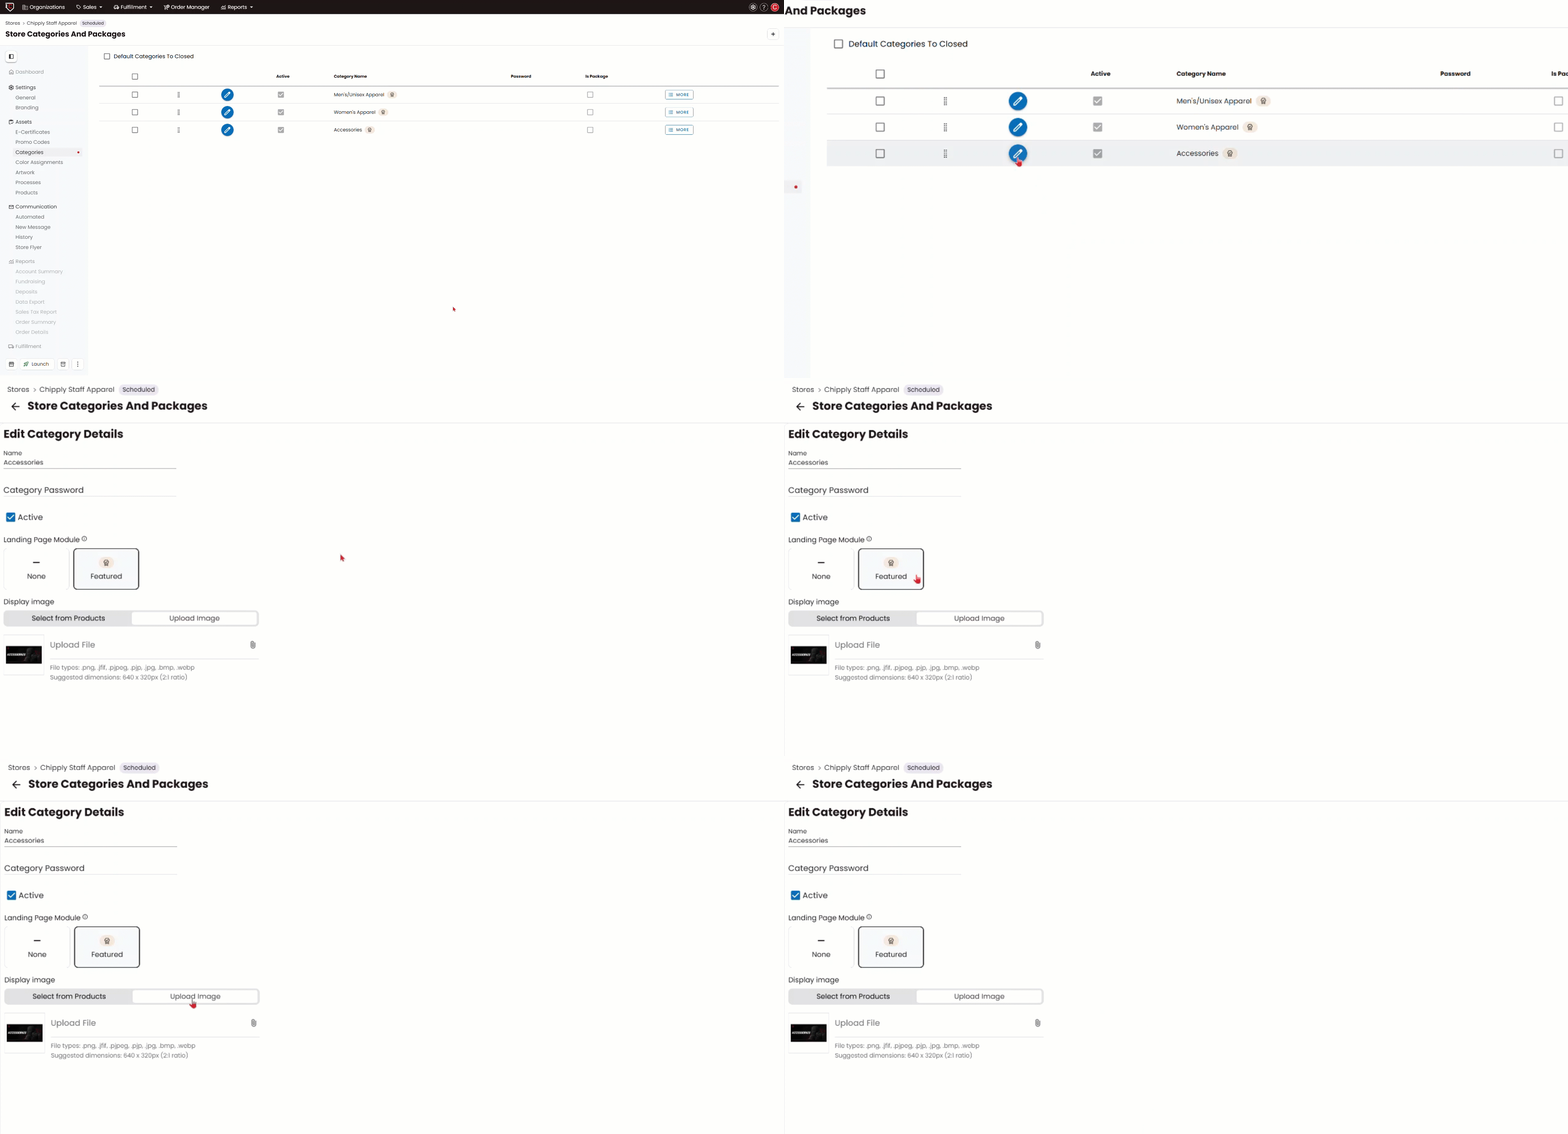
Image Dimensions
Chipply doesn't provide default artwork for banners or category tiles, so you'll need to supply your own. Build your graphics at these exact sizes so they don't look stretched or cropped:
- Category images: 640px wide × 320px tall
- Banner image: 2000px wide × 500px tall
Creating the Graphics
Since these images aren't provided for you, we recommend using a free design tool like Canva, or an AI image generator like ChatGPT, to build a matching set of graphics for your store.
Tips for a polished result:
- Take screenshots of the actual products in your store. Feeding these in as reference makes the categories feel personal to the store you're building, rather than generic stock art.
- Keep every graphic in the set visually consistent: same color palette, same fonts, same overall style.
- Make sure the category name is bold and easy to read at a glance so shoppers instantly know what they're clicking into.
Sample ChatGPT prompt:
Here's a Chat GPT prompt you can adapt with your own logo, colors, mascot, and category names:
Create branded online store graphics for a school/team apparel store. Use the
attached logo, website, school colors, mascot, and product photos as branding
reference, and keep the style consistent across every image in the set.
Deliverables:
- 1 banner image: 2000px wide x 500px tall
- 1 category image per category listed below: 640px wide x 320px tall
Categories: [list your category names here, e.g. Spirit Wear, Band, Cheer,
Cross Country]
Guidelines:
- Build each image at its exact final dimensions. Don't crop or stretch an
existing design to fit, since that looks warped.
- Make the category name bold, high-contrast, and instantly readable.
- Use sport- or category-specific visuals where it helps (equipment, fields,
courts, mascot elements). If athletes are shown, keep them natural and
sport-appropriate; if not, lean on equipment, textures, and brand graphics
instead.
- Don't invent a new logo. Use the one provided, unchanged.
- Confirm the exact pixel dimensions of each file before sending it back.
Export as individual PNG files (zipped together if there's more than one).