![Fabicaon.png]](https://44059364.hs-sites.com/hs-fs/hubfs/Fabicaon.png?width=40&height=40&name=Fabicaon.png)
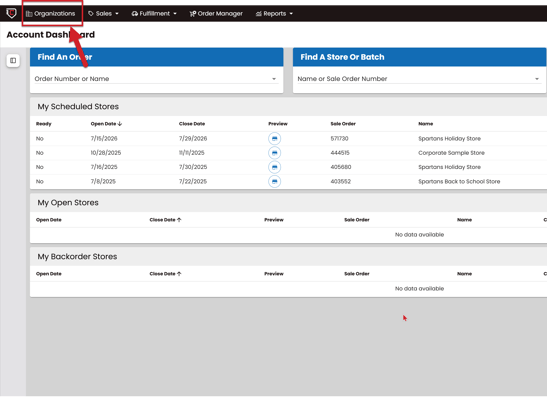
The Organizations Page of Chipply has been redesigned with a cleaner layout, more functionality, and better coordination of the information you need to manage your Organizations within your Chipply account. The way you navigate to Organizations has not changed, you will still find it in the top navigation bar.
Organizations are becoming increasingly important as Chipply continues to grow. Features like Invoicing, Offline Sales, and Rostering will rely on your organization data, so taking time now to make sure your organizations are accurate and up to date will go a long way. If you have not used this section much before, this is a great time to review your accounts and clean things up.
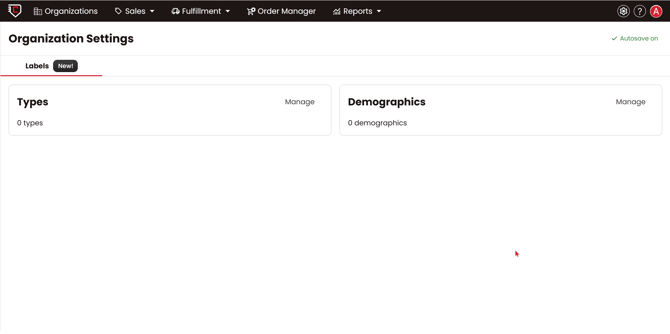
Organization Settings
Organization Settings is accessible by hovering over the gear icon in the top right and selecting Organization Settings. This is a new area where you create and manage the types and demographics used across your organizations.
Types: Examples include team sales, corporate sales, or retail. You can also add a new type on the fly when editing an organization — you do not need to come here first. If a type is attached to an existing organization, you can deactivate it but not delete it.
Demographics: An add-on classification layer that works alongside types. Work with your account manager to determine what makes sense for your business.
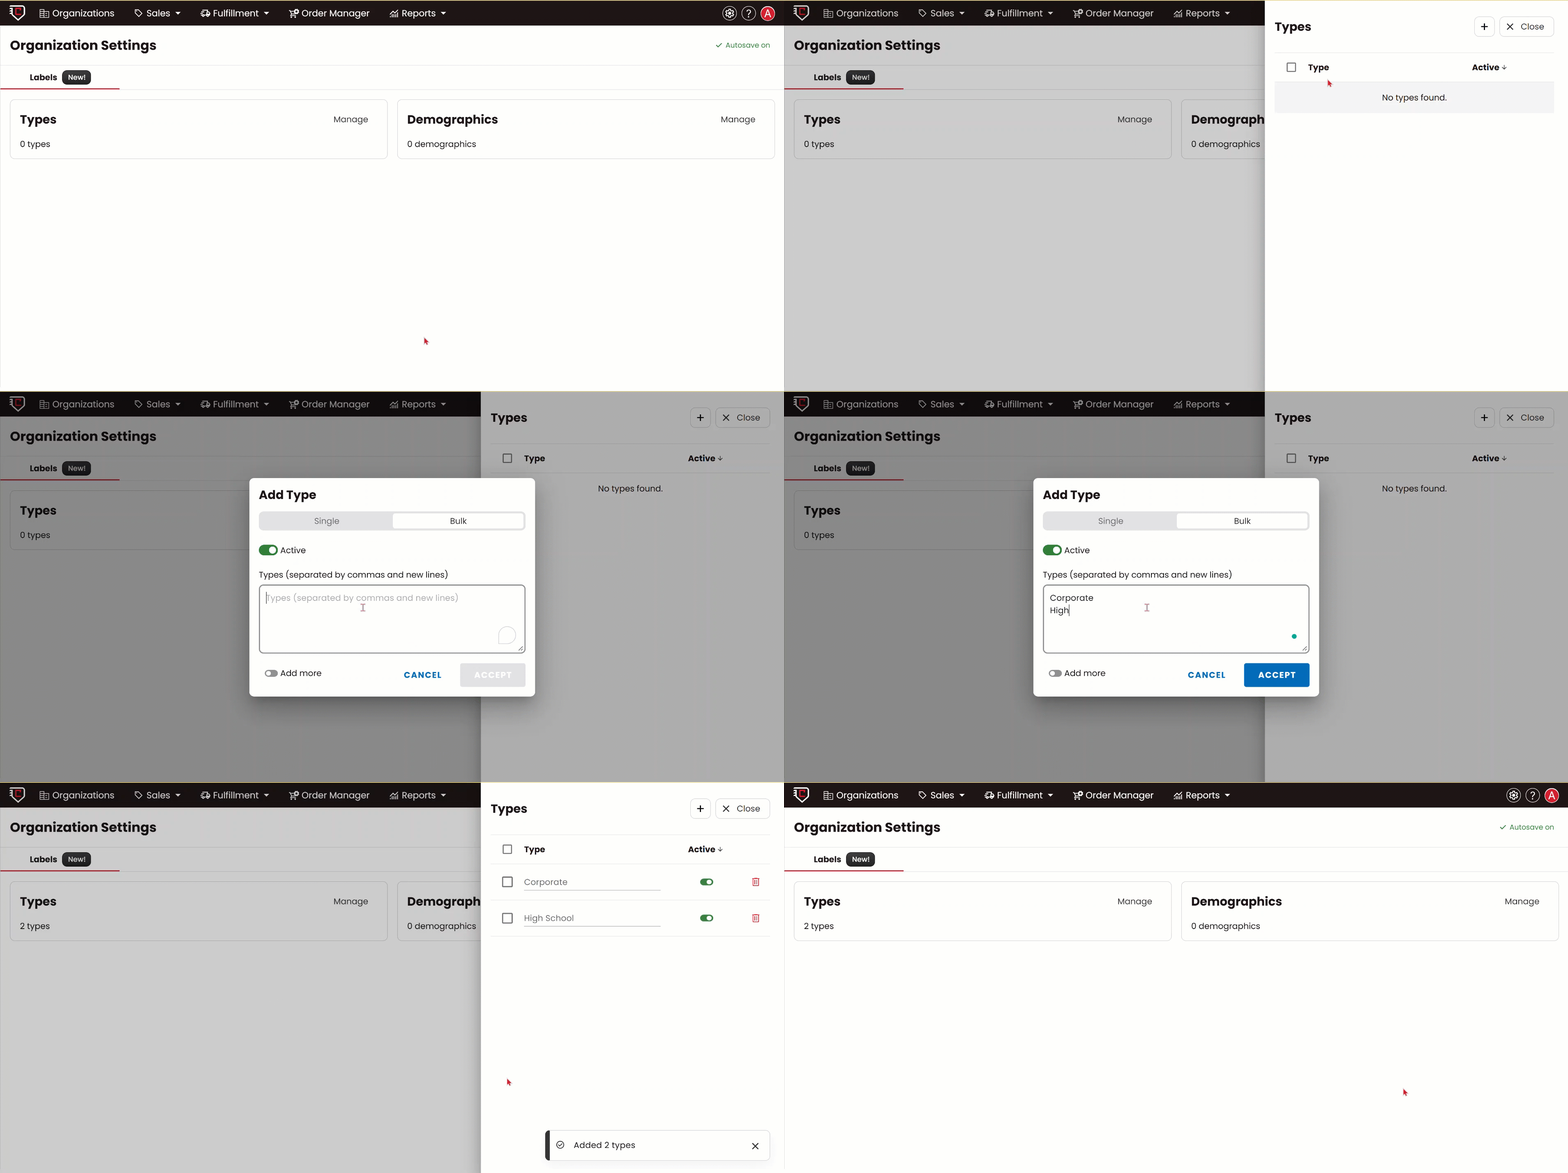
To add a new Type or Demographic
- Hover over the gear icon in the top right and select Organization Settings.
- Click Manage next to Types or Demographics.
- Click the + button to add a new entry, or click Bulk to add multiple at once.
- When you are finished, click Accept.
The Organizations List
Navigating to your Organizations page is easy, just click Organizations on your top navigation.
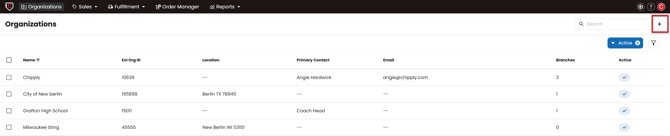
When you open Organizations, you will see a list of all your organizations. The list shows each organization's name, external org ID, location, contact and email, branch count, and whether it is active. Active organizations are shown by default.
You can select multiple organizations using the checkboxes on the left and perform bulk actions. Currently, the available bulk action is making organizations active or inactive. More bulk actions will be added in the future.
Use the search bar at the top to find organizations by name or external org ID. Use the filter drawer to narrow your list by additional criteria, including branch name, type, demographic, tax type, contact email, city, state, and zip.
To add a new organization, click the + Add button in the top right.
Manage an Existing Organization Page
Clicking into any organization opens the Manage Organization page, which is organized into four tabs: Profile, Branches, Contacts, and Rosters (coming soon).
Profile
The Profile tab contains all the core information for the organization.
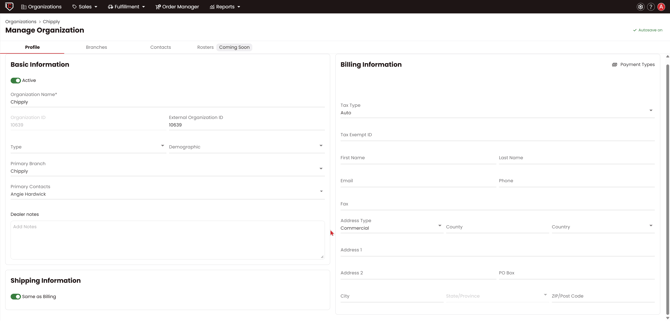
Basic Information
Organization Name: The name of the organization. This is a required field.
Organization ID: A Chipply-assigned number that is automatically generated when the organization is created. This number is permanent and cannot be changed, similar to a sales ID.
External Org ID: A customizable field. If you have an internal reference number from another system for your customer, you can enter it here. When you create a new organization, the External Org ID is automatically populated with the same number as the Org ID.
Type: A category you assign to the organization, such as team sales, corporate sales, or retail. Types are managed in Organization Settings, but you can also add a new type on the fly directly from the organization form. See the Organization Settings section below for details.
Demographic: An additional classification layer. If Type is the broader category, Demographic lets you get more specific. For example, a school district might have team sales as the type and then baseball, basketball, or band as separate demographics. Like types, demographics are fully customizable.
Primary Branch: If the organization has multiple branches, you can designate one as the primary.
Primary Contacts: You can assign one or multiple primary contacts to an organization. For example, a school district might have a single athletic director as the primary contact, while a sports league might have contacts for each sport.
Dealer Notes: Notes entered here are visible any time you are working with this organization. Use this for things your team should always know, such as payment terms, key contacts in accounting, or anything that needs to stay top of mind when building or managing stores for this customer.
Billing Information
The Billing Information section is one of the most important parts of the organization profile going forward. When you send an invoice to a customer, Chipply will pull the billing contact and address from here. Taking the time to fill this out accurately now will save you steps later.
Require a Purchase Order (PO): Toggle this on if this organization requires a PO number on invoices. This setting ties directly into how invoicing will work with this customer.
Tax Type: Set the tax type for this organization. The default is Auto.
Tax Exempt ID: If the organization is tax-exempt, enter their exemption ID here.
The Billing Information section also includes fields for the billing contact's name, email, phone, fax, and full address.
Shipping Information
At the bottom of the Profile tab is a Shipping Information section. By default, shipping is set to Same as Billing. This section is in place for future use.
Branches
The Branches tab lists all branches associated with the organization. The list shows each branch's name, external branch ID, primary contact, phone, email, and active status.
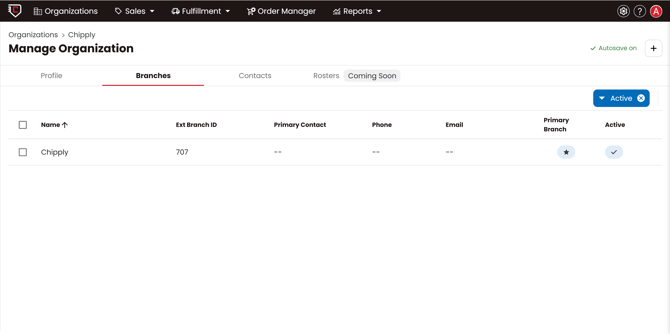
Organizations do not require branches, but branches are helpful when a customer has multiple locations, divisions, or departments. For example, if Walmart is the organization, the branches might be each county or city location.
To add a new branch, click the + button in the top right. To clean up unused branches, you can deactivate any that are no longer relevant.
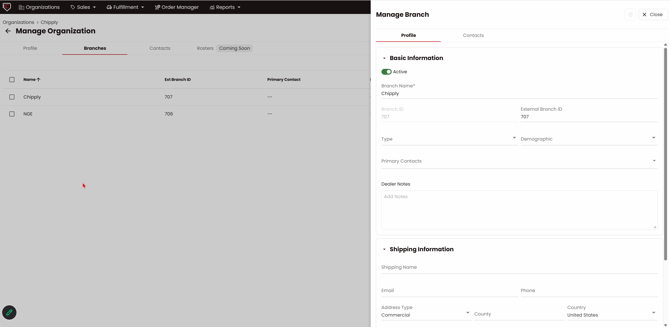
Click into any branch to open the Manage Branch panel on the right side of the screen. This panel has two tabs:
Profile
Basic Information
Branch Name: The name of the branch. This is a required field.
Branch ID: A Chipply-assigned number that is automatically generated when the branch is created. This number is permanent and cannot be changed.
External Branch ID: A customizable field for linking the branch to a record in another system.
Type: A category you assign to the branch, using the same types available across your organizations.
Demographic: An additional classification layer for the branch.
Primary Contacts: The primary contact or contacts for this branch.
Dealer Notes: Notes specific to this branch, visible when working with this branch in store manager.
Contacts
The Contacts tab shows all contacts across the organization, regardless of which branch they belong to. Contacts are displayed as cards.
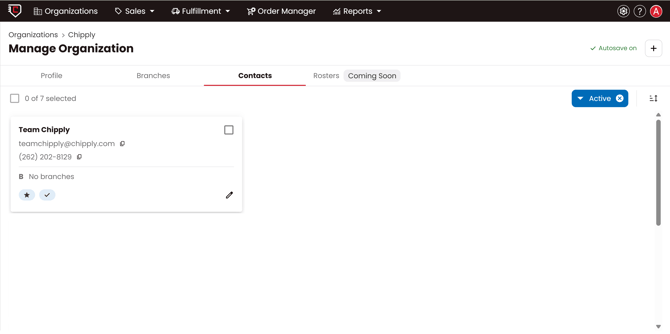
Each contact card shows a checkmark icon indicating whether the contact is active, and a star icon indicating whether they are a primary contact for the organization. You can hover over these icons to see what they mean.
To add a new contact, click the + button in the top right. Note that you will need to save the contact before you can assign them to branches.
When adding or editing a contact, you can set:
- External User ID — An optional field to link the contact to a record in another system.
- Primary contact for the organization — Toggle this on to mark the contact as a primary contact.
- Billing Contact: Toggle this on to designate a billing contact for the organization.
To assign contacts to branches or make bulk changes, check one or more contact cards. A menu will appear at the bottom of the screen with options for Change Status, Assigned Branches, and Delete.
To edit an individual contact, click the pencil icon on their card.
If you are adding multiple contacts at once, use the Add More toggle at the bottom of the form to keep it open after saving each one — this lets you add several contacts in a row without reopening the form each time.
Rostering — Coming Soon
A Rostering feature is coming to Organizations. Rostering will allow you to upload a list of players, employees, or members for an organization and manage them directly in Chipply — including assigning e-certificates, player numbers, and other options. More details will be shared as this feature becomes available.
If you have any further questions, please don't hesitate to reach out to the team.
Email: teamchipply@chipply.com
Phone: 262-202-8129