![Fabicaon.png]](https://44059364.hs-sites.com/hs-fs/hubfs/Fabicaon.png?width=40&height=40&name=Fabicaon.png)
Chipply's Printavo integration sends your work orders straight into Printavo. With Printavo V2, you can consolidate all of an order's processes onto a single invoice, and Chipply also transfers production notes, artwork PNGs, and multiple product images for garments decorated in more than one location (for example, front and back prints).
Before you start: You need both Printavo and Printavo V2 set up in Chipply. You can use the same Printavo login for both. Chipply uses the settings from Printavo V2, but the original Printavo integration must be in place for V2 to work.
What You'll Need- A Printavo login that belongs to a Super Admin account in Printavo.
- A Printavo plan that supports integrations. Some basic Printavo packages do not, so you may need to upgrade your plan.
Step 1: Add the Original Printavo Integration
- Click the Settings Gear on the top right hand side of your screen and then click Dealer Settings
- On the top navigation click: Intergrations
- Click + Add button.
- Select Printavo.
- Enter your Printavo username and password and save.
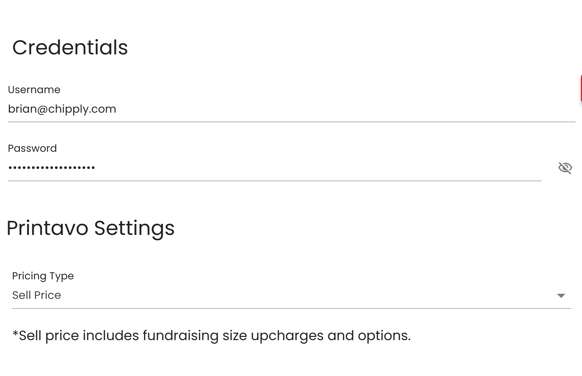
Credentials are case-sensitive, so double-check that the username matches exactly.
Step 2: Add Printavo V2
- Select Printavo V2, then click the Printavo logo.
- Enter the same Printavo username and password you used in Step 1.
- Choose a Pricing Type:
- No Pricing: Use this if you enter totals manually in Printavo.
- Combined Price: Includes both product and decoration costs.
- Sell Price: Shows final pricing. Not recommended, since it separates items with different options.
- Set One Process Per Invoice:
- Unchecked: All processes are grouped onto one invoice.
- Checked: Each process goes on its own invoice.
- Save.
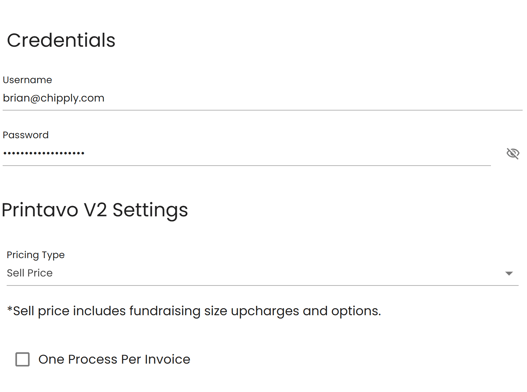
These Printavo V2 settings are the ones Chipply uses going forward.
Step 3: Confirm It's Working
- Go to the Work Orders page.
- Confirm the Export to Printavo option appears.
- Select a salesperson and choose the store name from the dropdown to export.
There is currently a bug on Printavo's end where the back (or other) image is listed first and the front image is listed second. Take extra care when printing shirts with multiple logos until Printavo resolves this.
Video WalkthroughWatch the full walkthrough here: https://www.youtube.com/watch?v=tF2lMgLsK78